- Introduction
- Clean Install Windows 11 on Supported Harwdware
- Fresh Install Windows 11 without TPM on Unsupported Hardware
- Windows 11 TPM Requirements
- Upgrading to Windows 11
- Summary
1. Introduction:
The new Microsoft Windows 11 is the latest production from Microsoft for its major product serving as an operating system. Unlike its previous operating system version, Windows 10, you need to meet a more stringent minimum system requirements to successfully install it on your PC. The main requirements are; UEFI with Secure Boot support, Trusted Platform Module (TPM) support and the requirement of a modern CPU. Furthermore, you can check if your PC meets the minimum requirements for installing Windows 11 using the official tool from Microsoft PC Health Check App.
However, there are procedures that allow installing Windows 11 bypassing requirements and restrictions on older computers. In this article we will describe both methods described above that allow you to successfully install Windows 11 from USB on both newer and older computers.
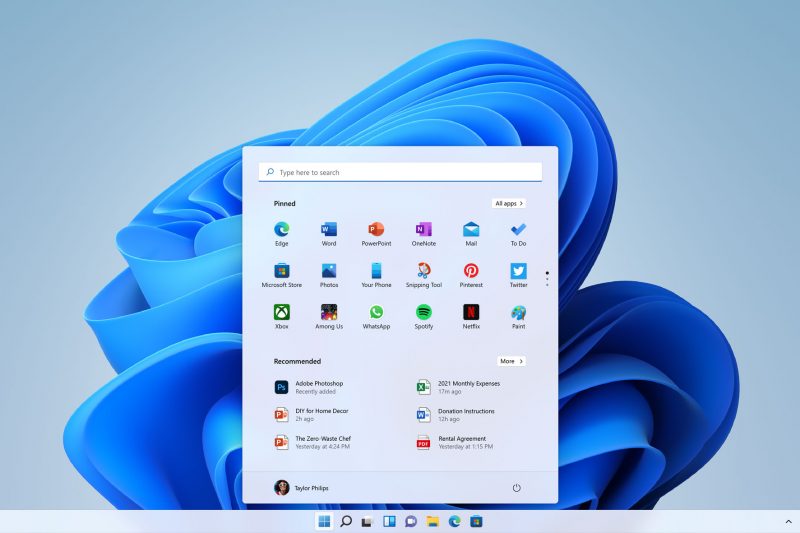
Windows 11 OS – Home Page
2. Clean Install of Windows 11 on Supported Hardware
Keywords:
Clean Install of Windows 11 from USB drive
Fresh Install of Windows 11 on Supported Hardware
Install of Windows 11 on New Computers and Laptops
Installing Windows 11 on PC that Meets the System Requirements
Installing Windows 11 is more complex when compared to the previous operating system of Windows 10. This is because Microsoft wanted to put greater emphasis of the security side hence making it more difficult to install Windows 11 on older computers. To meet the minimum system requirements of Windows 11, your PC must be equipped with modern technologies including support for the following; TPM 2.0, Secure Boot, UEFI bios, modern CPU plus other requirements for storage and memory.
To simplify the installation process we have divided this task into two parts;
1. Creating a bootable USB drive for installation process, see our other tutorial Windows 11 Media Creation, method one. Please make sure you have the bootable USB media ready created prior to proceeding with this tutorial.
2. Step-by-Step instruction with clear screenshots for installing Windows 11 from USB drive, which is described belwo.
STEPS:
1. Enable TPM security and Secure Boot in your system bios and make sure that your PC can boot from the USB drive first.
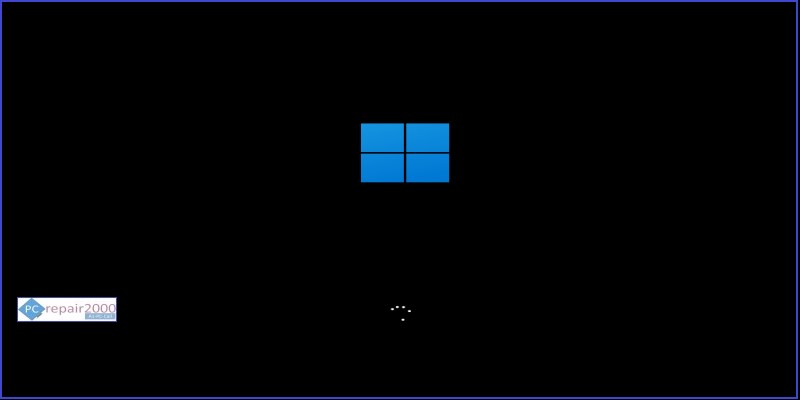
2. Insert the prepared bootable USB drive into your PC and power on your system. You should be able to the see the new Windows 11 logo, a flat square blue window.
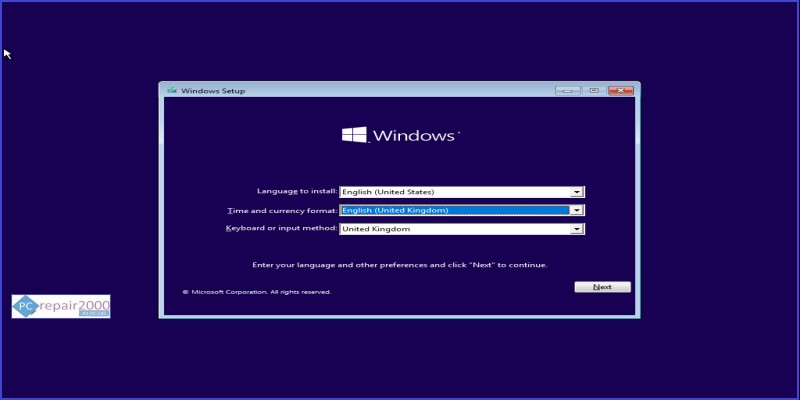
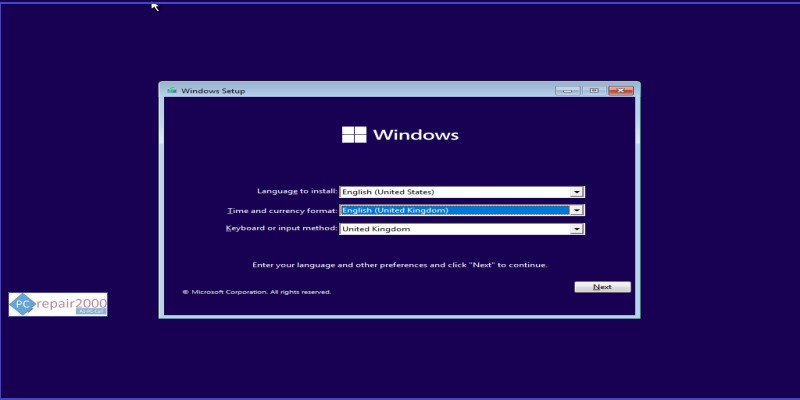
3. Select the language and click next.
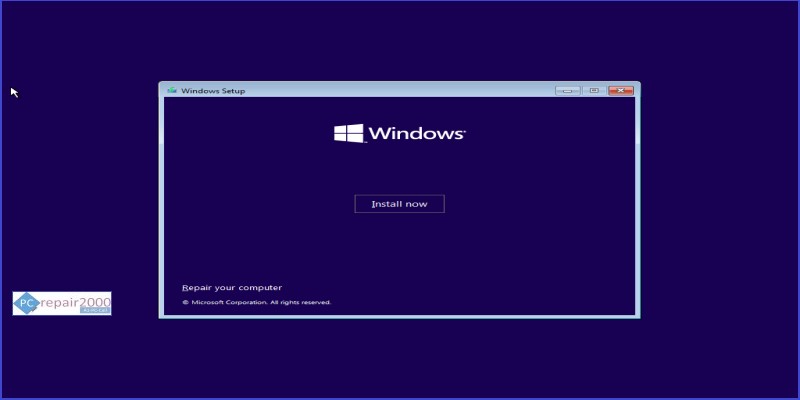
4. Click install now.
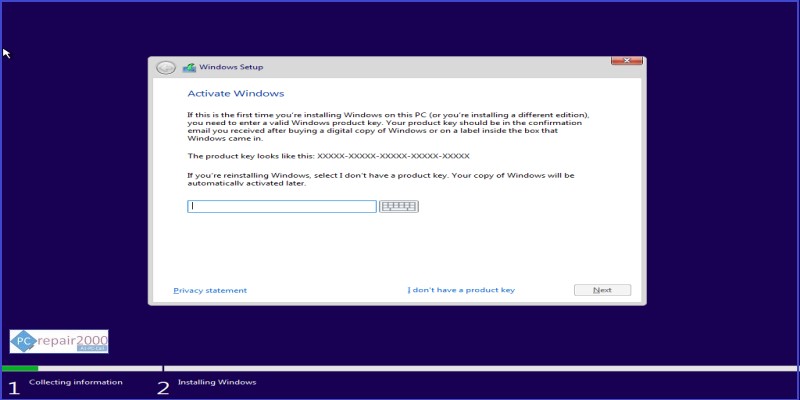
5. Enter your Windows 11 product key if you have one or select I don’t have a product key.
6. Select the required version of Windows 11. Pleaae note that this screen will not be shown if you are rei-nstalling Windows 11 in a computer that was shipped pre-installed with with Windows 11, in this case the licence is embeded in the hardware bios and will be selected automatically.

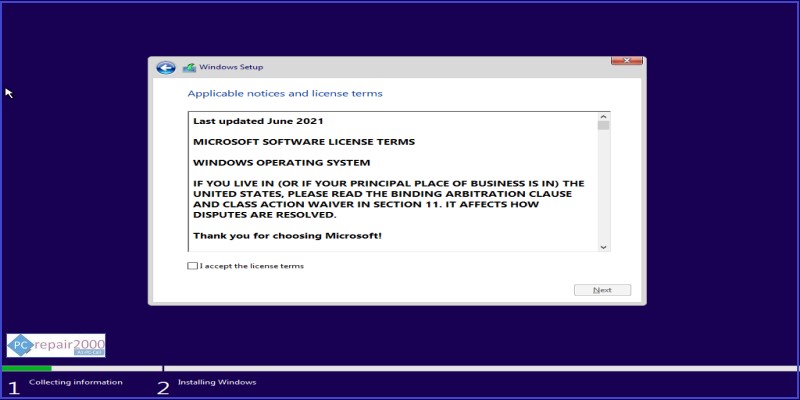
7. Please tick the box to accept the terms and conditions and click next.
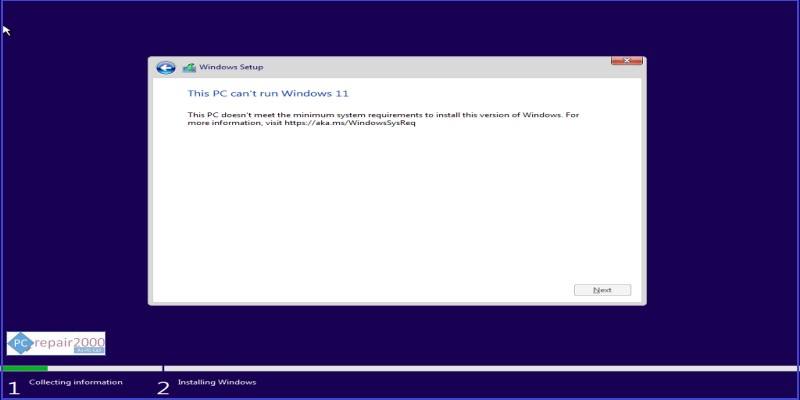
8. If your PC does not meet the minimum hardware requirements then the you will see the screen below. You need to adjust your system bios options or to use the methods described later for unsuspported hardware.
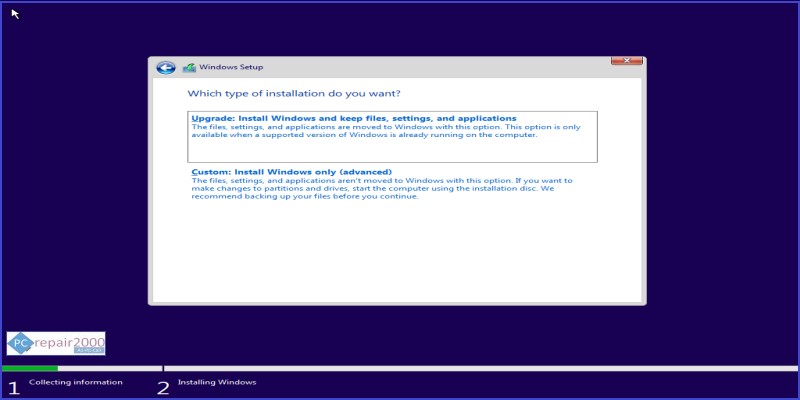
9. If you have reached the screen below then you have passed the minimum system requirements checks. For fresh install of Windows 11 please select the Custom install option. This option will format your hard drive and delete all data. The upgrade option is for installing Windows 11 and keeping an existing installation files.
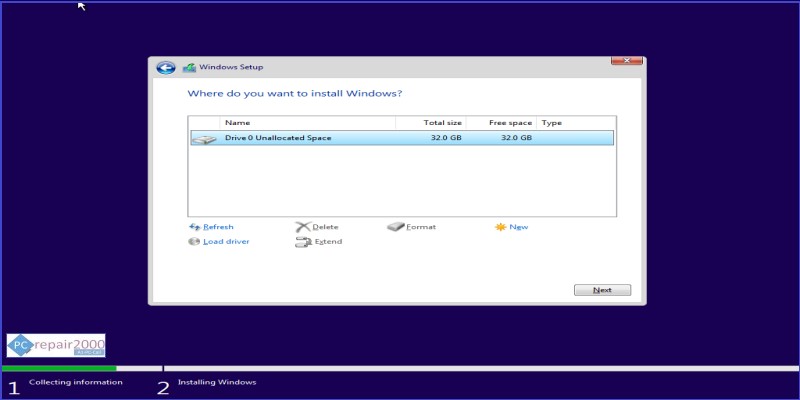
10. Please select the required drive and click next. Several partitons will be created automatically for Windows 11 installation. If the system drive has already been partitioned, or containing previous installation, it is recommended to delete all partitions until your drive shows as a one unallocated volume as shown in the image below.
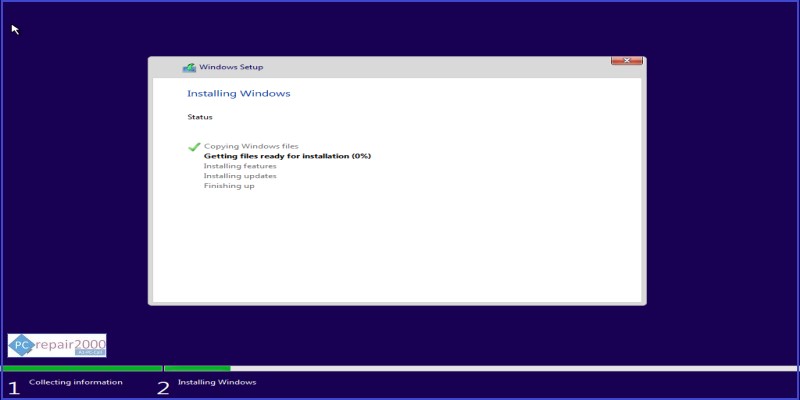
11. The Windows 11 installation process should proceed with multiple stages as shown in the image below. Your PC should restart at the end of this stage. After your computer restarts you can safely remove your bootable USB media as the installation process will contiue using the files already loaded into the hard drive.
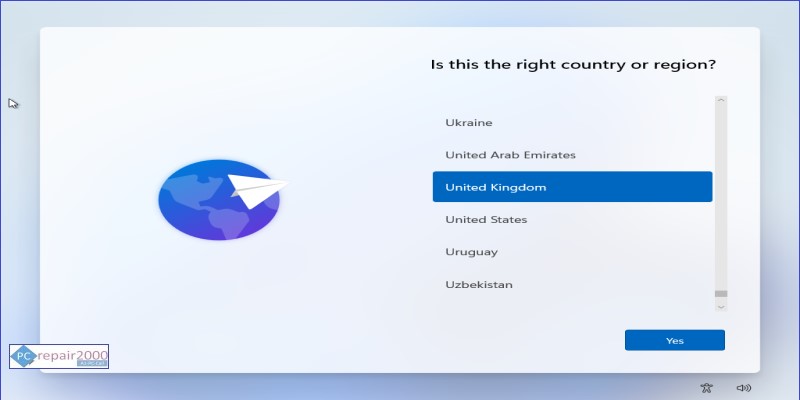
12. Select your language and keyboard layout.
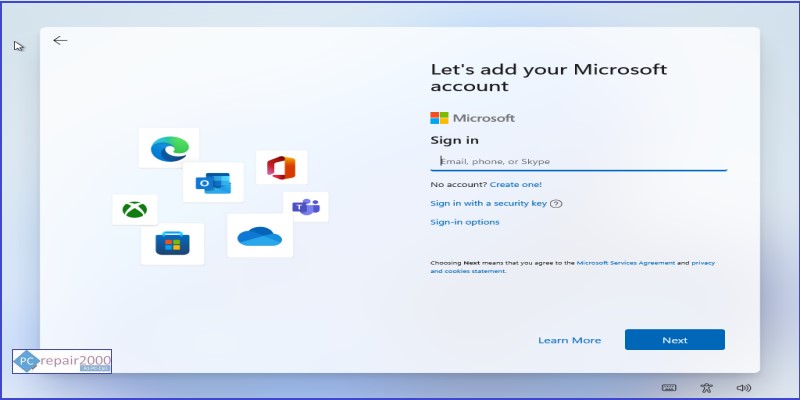
13. Enter your email address, or select sign-in options for alternative choices.
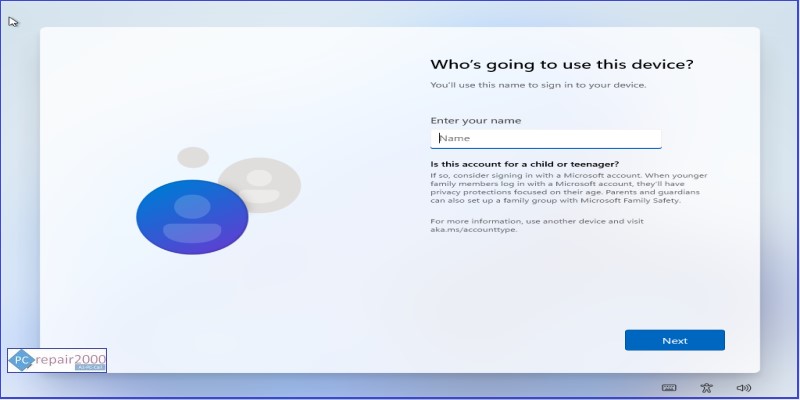
14. Enter user name for offline accounts.
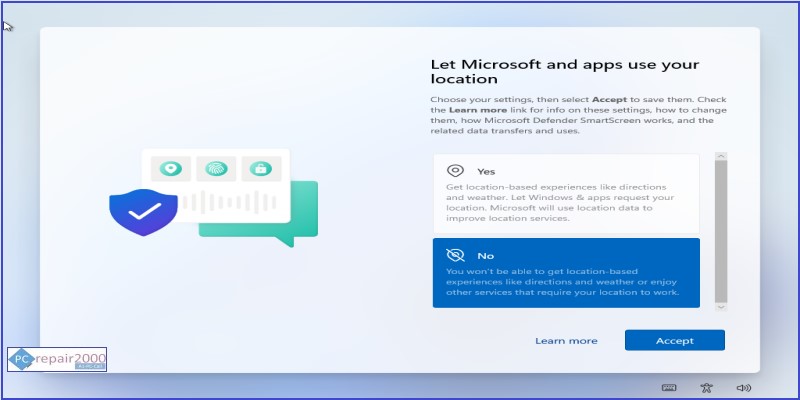
16. Select the appropriate choices, several screens.
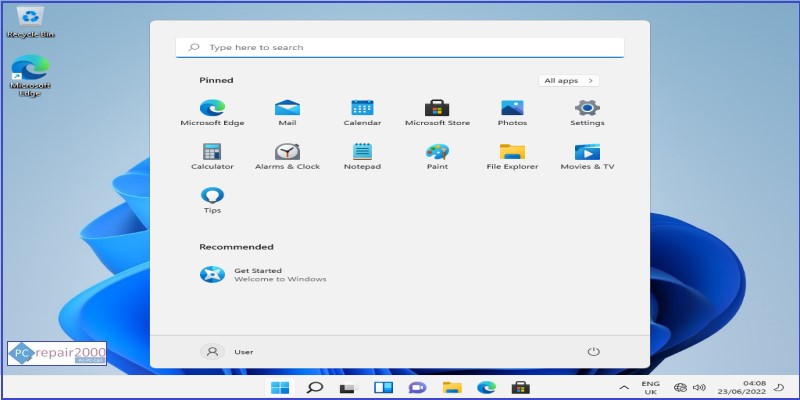
17. You have completed the installation of Windows 11.
2. Fresh Install of Windows 11 without TPM on Unsupported Hardware
Keywords:
Fresh Install Windows 11 without TPM
Clean Install Windows 11 without UEFi
Fresh Install Windows 11 without Secure Boot
Install Windows 11 on unsupported CPU
Install Windows 11 without requirements
Fresh Install Windows 11 on unsupported Hardware
If your computer or laptop does not meet the minimum system requirements, you can still install Windows 11 bypassing TPM UEFI Secure Boot and CPU requirements. In Windows 11, legacy bios and CSM booting is not officially supported. However, in this case, we will follow the same steps described earlier but we will add an additional step by creating a bypass process. The steps described below will address; Install Windows 11 without TPM, install Windows 11 without Secure Boot, install Windows 11 without UEFI legacy bios support and install Windows 11 on unsupportred cpu for older computer. Please note that the procedure described below assumes a fresh install of Windows 11 and does not apply to the upgrade process.
There are three methods for performing a clean install of Windows 11 on unsupported hardware and as described below:
Method 1:
Install Windows 11 on Unsupported Hardware
[Rufus Tool]
Download Rufus Tool, minimum version required is 3.17, and you can download either the portabe or installable version. In recent versions of this utility an additional option has been added to enable conversion of the Windows 11 to support older computers and unsupported hardware. Please observe the following regarding the usb bootable media:
1. You may need to disable secure boot in system bios, if you have used RUFUS tool to create the bootable media.
2. Ensure that your system bios booting mode (MBR or UEFI) is setup to match your selection during the media creation using the Rufus method.
3. Enable your system bios to boot from your USB drive first, ore press the relevant fuction key during she startup process.
STEPS:
1. 
….. in progress
Method 2:
Install Windows 11 on Unsupported Hardware
[Install.esd Method]
This method relies on using the Windows 1o installation interface with an embedded core windows 11 files, namely the file install.esd. By using this trick, the install process starts with the Windows 10 inerface hence bypassing all the checks for TPM, Secure Boot, UEFI, CPU, etc. However, the inclusion of the install.esd file from the Windows 11 installation files will allow core windows 11 technology to be installed instead of Windows 10. One noticeable difference during this process is that you will see the Windows 10 loading logo during the initial stages of the install process and not the newer Windows 11 logo.
Full details for the creation of the installation media has been details in our blog Windows 11 media creation. Please follow the steps described in the Install.esd Windows 11 media creation method. After completing the process and successfully creating the bootable USB media please start the Windows 11 installation as described in the above section, method 1.
Method 3:
Install Windows 11 on Unsupported Hardware
[Registry Edit]
This method can be used to clean install Windows 11 without TPM on unsupported hardware or older computers. This method does not work for the upgrade to Windows 11 with unsupported hardware.
STEPS:
1. Download official Windows 11 ISO Disk image file from Microsoft website.
2. Prepare a bypass file by using a text editor such as notepad. Paste the following registry modifications text below into a new notepad file, then give the file a name such as bypass.reg
———-
Windows Registry Editor Version 5.00
[HKEY_LOCAL_MACHINESYSTEMSetupLabConfig]
“BypassTPMCheck”=dword:00000001
“BypassSecureBootCheck”=dword:00000001
———-
2. Create a bootable media by using the Microsoft Media Creation Tool, full details are provided in our blog Windows 11 Media Creation.
3. Ensure that your systm bios is setup to boot from the USB drive first. If you still cannot boot from the usb drive you may need to disable, Secure boot, TPM or UEFI in the system Bios.
4. Start your PC, installation should starts from USB drive, select the language and click next.
5. The next screen should give you the option to the start the installation, do not click install.

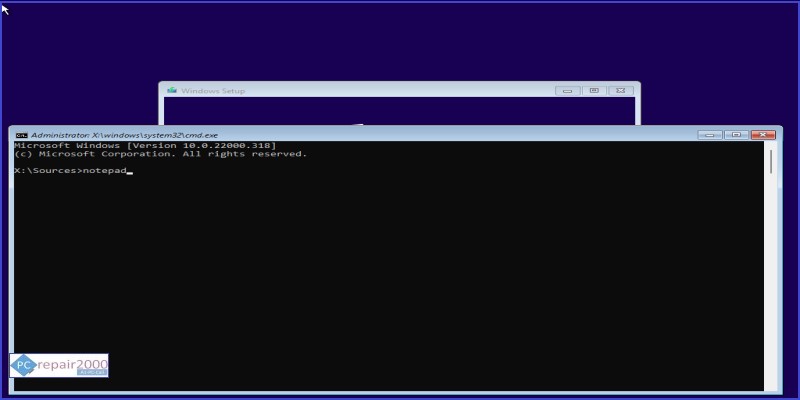
6. In order to the bypass the system requirements for Windows 11 we need to load the registry edit file that was created earlier. Press Shift+F10 to display command prompt screen. Type (notepad) to start the notepad application.
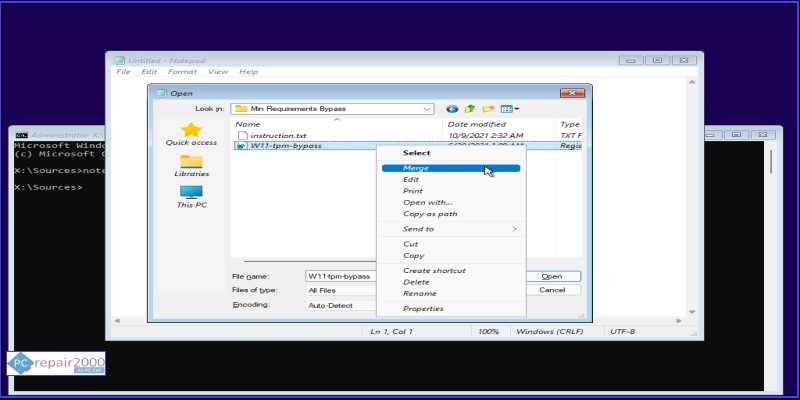
7. From file menu, select open, then scroll to select the file bypass.reg (do not open the file). Right click on the bypass.reg file and Select merge from the context menu.
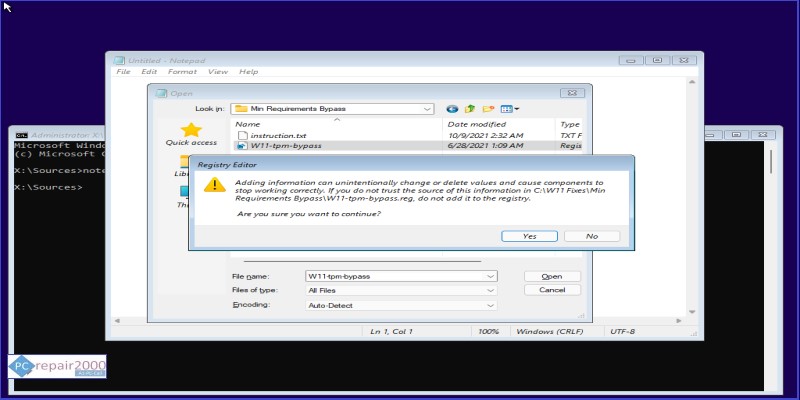
8. A confirmation message should popup to warn you about changes to the registry. Select yes to update the system registry details. Close notepad, and command prompt window.
9. Continue the installtion from step 8 in method 1 described above, to finish installing Windows 11.
3. Windows 11 TPM Requirements:
Trusted Platform Module (TPM) is a hardware-based security feature which is usually an electronic chip that is emdeded in the system motherboard. Its function therefore is to secure a system by encrypting its data using a cryptographic function. It is also used to limit access to system hardware by requiring a secure key.
Unlinke Windows 10, Microsoft Windows 11 TPM requirement is a full support by the hardware for TPM 2.0. Windows 11 TPM implementation is more strict to enhance system security. Windows 11 TPM requirement can present compatibility issues for older hardware making installation of Windows 11 more difficult. There are procedures that when followed will allow you to install Windows 11 without TPM requirement. Full details will be given in the following sections.
The required TPM settings can be accessed via the the computer BIOS program. Make sure that TPM option is selected and enabled. If you cannot see these options this mean that your computer does not support the TPM feature. Another way of accessing the TPM module is within Windows 10. Start the command run windows (Windows key+R) and type: tpm.msc and the TPM console should be displayed.
For details regarding UEFI, Secure Boot, CSM and Secure Boot please see our other blog installing Windows 10 UEFi CSM MBR with instructions for setup of UEFI, CSM, Secure Boot and Legacy bios.
4. Upgrading to Windows 11
The procedure described above is for installing a fresh copy of Windows 11 in an empty hard drive. However, if you have Windows 10 already installed and you wish to upgrade to Windows 11 then there are 2 different scenarios:
Scenario 1:
If your PC have a supported hardware and satisfies all system requirements then you can upgrade your Windows 10 to Windows 11 using the Windows 11 Installation Assistant.
Scenario 2:
Installing Windows 11 on unsupported hardware can be done with a workaround bypass if certain conditions are met. First, some form of TPM support must be present in the Bios, all versions of TPM should be fine, including TPM 1.2 and TPM 2.0. Secondly, UEFI and secure boot must be supported by by the PC hardware. As for the processor CPU support there are no issues as you can install Windows 11 on unsupported cpu without restrictions applied during this procedure.
Full instruction for upgrading to Windows 11 is given in our other blog Windows 11 Upgrade Guide.
5. Summary:
This guide offers step-by-step instructions and guidance for installing and upgrading to the new Microsoft Windows 11 operating system. This is a comprehensive guide covering all types of computers old and new.
Additionally, An upgrade from Windows 10 to Windows 11 instructions will be given if you wish to keep your installed programs and data.
Please observe the following for a successful installation of Windows 11:
- If your PC or laptop is less than 3 years old it is likely that it will be compatible with all the requirements to fresh install Windows 11 from scratch.
- For older computers it is possible to install Windows 11 on unsupported hardware. A workaround is required to perform installation of Windows 11 without TPM and not meeting the system requirements. Please follow the instructions given in this blog for installing Windows 11 bypassing requirements.
- Upgrade to Windows 11 can only be performed for computers that have support for TPM and UEFI.
- To block upgrade to Windows 11 follow the instruction given earlier and prevent notifications for Windows 11 upgrade in the future.
- To create a Windows 11 local account, instruction was provided guiding you on how to install Windows 11 without Microsoft account.