- Introduction
- How to Install Windows 10/8/8.1/7 From USB Drive
- Installing Windows 11
- UEFI Boot Mode
- UEFI Boot Reference Table
- Summary
1. Introduction:
For Windows 11 install please see our other blog for complete details on installing Windows 11 on new and old PCs with instructions for settings for TPM, Secure Boot, UEFI and how to bypass the system requirements.
Microsoft Windows installation is nowadays mostly carried out using USB flash drives. This method is more convenient when compared to the traditional CD/DVD drive method. However, small number of users may still be using the traditional CD/DVD drives for installing windows due to its simplicity. In this article the focus is on preparing external bootable USB drives, which can be external USB flash drive or external USB hard drive. However, the same rule will still apply if you are using a CD/DVD drive with a slight difference.
Modern systems have evolved in the way they boot the operating system and have increased in complexity. For example, Microsoft Windows 10 is mostly installed using bootable USB drive. This guide aims to address failed USB Windows 10 installation and the correct procedure to fix and avoid Windows booting problems.
If Windows 10 won’t boot or you have failed Windows installation then check the booting table below first. To simplify the booting process options, we have developed a unique UEFI/MBR boot table that users can use as a reference guide when they encounter booting issues such as Windows 10 not booting, see section 4 below.
If your PC Windows 10 not booting after update or Windows 10 not starting and stuck in automatic repair loop please check our blogs section guide Windows 10 not Starting.
For more advice on how to troubleshoot PC problems see our PC Repair Advice and Troubleshooting Tips page, or for full lists of our current PC Blogs see our Blogs Section.
2. How to Install Windows 10/8/8.1/7 From USB Drive:
In this section we will show you how to install Windows 10 from USB drive. This instruction applies to all Microsoft Windows operating systems including:
■ Installing Windows 10 from USB drive.
■ Installing Windows 8.1 from USB drive.
■ Installing Windows 8 from USB drive.
■ Installing Windows 7 from USB drive.
The format of the installation files in the USB drive must comply with the requirements in order to install windows successfully.
However, you can assume that most modern ISO installation files for modern systems or utilities are UEFI compatible. In comparison if you have an old computer then it may not be UEFI compatible therefore you need to adjust your BIOS settings and hard drive format accordingly as described below.
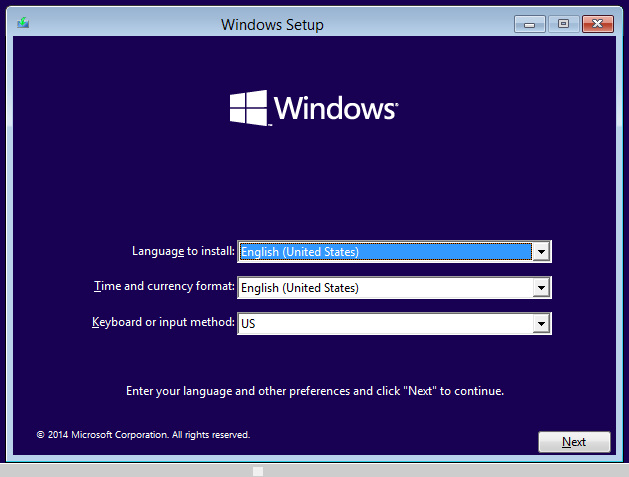 Microsoft Windows setup screen
Installing Windows 10/8/8.1/7 in UEFI mode:
The method described below applies to installing Windows 10 using uefi, installing Windows 8/8.1 with uefi mode and also for installing Windows 7 using uefi mode. It can also be used for all brands of computer including; Dell, Lenovo, HP, Toshiba, Acer and many others. This procedure is for installing Windows 10 from ISO file (You can use this step by step procedure for preparing any bootable media, not just Microsoft Windows)
1. Download Windows ISO file, make sure it is UEFI compatible, ie UEFI ready. (Must have the folder (EFI\boot\bootx64x.efi).
2. Use Rufus utility to create bootable media, select UEFI mode. For instructions, see section below.
3. Set your system bios to UEFI mode.
4. Disable secure boot in the system Bios.
5. Select boot from USB in bootable order under system Bios.
6. Hard drive format must be in GPT type or let the install utility auto format your disk.
7. After installing Microsoft Windows 10 from iso go to system Bios and re-enable secure boot.
Installing Windows in Legacy Mode (Windows 10, Windows 8/8.1 or Windows 7):
This procedure applies to installing windows 7 using legacy mode, installing Windows 8/8.1 with legacy mode and also for installing Windows 10 with legacy mode. This is also valid for installing Windows 7 using CSM mode, installing Windows 8/8.1 using CSM mode and installing Windows 10 with CSM mode . It is ideal for older type of computers or windows 7 install in particular. To install Windows from iso file in legacy mode:
1. Download ISO file, make sure it is MBR compatible. (Does not contain the EFI folder).
2. Use Rufus utility to create bootable media, select MBR mode. For instructions, see section below.
3. Set your system bios to Legacy mode or CSM mode (Compatibility Support Module).
4. Select boot from USB in bootable order under system Bios.
5. Hard drive format must be in standard MBR type or let the install utility auto format your disk.
If your bootable USB drive is not detected during the installation process this means that you have not satisfied the above conditions..
EFI boot error messages:
When installing Windows 10 or from USB is not working, such as you encounter EFI boot error messages while booting from USB media or your bootable USB drive is not showing (bootable device not detected), please check the following:
■ Disable secure boot option in the Bios.
■ Disable fast boot option in the Bios, if available.
■ Enable Uefi boot in the Bios options.
■ Format USB media with FAT32 or use Rufus utility.
■ Make sure that USB ISO file is UEFI compatible.
■ Set your Bios option to CSM (last resort).
When you have followed these instructions it will allow This will allow installation media to boot successfully under UEFI and prevent error screens popping up. However, please re-enable the secure boot option after finishing the installation for added protection of your system. Please use our reference booting table below in section 4 for troubleshooting boot errors.
Prepare USB media for bootable installation:
To install Windows from USB media you need to use a special utility in order to make the USB drive bootable. The most common utility is provided by Microsoft and known as Windows Installation Media. An alternative option is to use the Rufus utility as it has a very flexible approach. Unlike Microsoft tool, this utility has many options that can be configured to meet your requirements.
Hardware BIOS options also must have the correct settings to enable the system to boot. Usually the BIOS options are accessed by pressing a special function key such as F2 after powering up the system. For example to boot Windows 7 in UEFI mode you must have a supported motherboard with efi mode enabled. The figure below shows a BIOS screen taken from a Dell computer. Modern systems commonly include four options for booting: Legacy MBR, Legacy UEFI (CSM), UEFI only and Secure Boot. Once again, these options must be aligned with the format of the internal hard drive and bootable media type.

You must ensure that your hard drive is formatted as GPT if you have selected UEFI format in the bios option. The format process is done automatically by the windows ISO file and you need not to worry about it.
If you encounter further errors during the installation process please check the boot reference table below in section 4 to resolve your issues.
3. Installing Windows 11
Installing Windows 11 with system requirements
Installing Windows 11 bypassing system requirements
Installing Windows 11 on New Computers
Installing Windows 11 on Older Computers
Upgrading to Windows 11
You can install Windows 11 on a modern PC that meets all the system requirements. Windows 11 TPM requirement is version 2.0 support. Further requirements include; Windows 11 UEFI and secure boot must be enabled in the motherboard Bios. Finally the Windows 11 CPU requirement must be satisfied as per the list of supported CPUs published by Microsoft.
If your computer or laptop does not meet the minimum system requirements, you can still install Windows 11 on unsupported hardware by bypassing these restrictions. In this case, we will create a bypass process to install Windows 11 without system requirements and without restrictions.
For installing Windows 11 full details are provide in our blog Installing Windows 11 From USB. If you wish to upgrade frome Windows 10 see our guide for Windows 11 Upgrade Guide.
4. UEFI Boot Mode:
If your Windows 10 not starting after update or, Windows 10 not booting and stuck in automatic repair please check our blog Windows 10 not Starting for further instruction.
New BIOS standard, known as UEFI, was introduced in 2012. Microsoft Windows 8 was the first version to utilise this new technology, followed by Microsoft Windows 10. In contrast, Microsoft Windows 7 is usually installed using the MBR disk format.
A common question is Uefi vs Legacy, Uefi vs MBR or Uefi vs Bios, What is the difference?
The new method of Uefi booting has introduced new improvements to the traditional legacy MBR based BIOS. Among these improvements are: Improved security, faster booting time, increased number of possible partitions and support for hard drives that are larger than 2TB. Please note that the legacy booting mode also referred to as MBR or traditional Bios.
For a successful UEFI mode booting many conditions must be satisfied:
- 64-bit operating system (with minor exceptions).
- GPT based hard drive partition.
- Additional FAT32 partition for boot files.
In the legacy MBR format, hard drives can have up to 4 primary partitions with NTFS/FAT32 format and boot files are stored inside the system partition, usually C drive. However, in the UEFI mode a FAT32 partition is required for storing the boot files. This is in addition to the standard system drive, which is usually ANTS formatted. Furthermore, for UEFI Bios mode the hard drive must be initialised as GPT format.
There is a cross-platform booting mode known as CSM (Compatibility Support Module) which is available in some modern computer systems Bios. In this booting mode, it is possible to boot a legacy operating system in a modern Uefi setup.
So what is the difference between Uefi and CSM, or Uefi vs CSM you may ask?
The CSM booting mode is one of the most misunderstood concept and people simply mistakenly believe it is another legacy mode. In fact the main purpose of having a CSM booting mode is to allow legacy media/system to boot in a UEFI hardware.
For example, if you have a bootable Uefi USB media or Hard drive containing windows 10 operating system then this will boot under either Uefi or CSM modes but not legacy Bios. Similarly, if your USB media or hard drive is legacy based, such as Windows 7, it will boot under both legacy and CSM Bios options. The section below explains in further details all of these booting modes and how to successfully boot a system.
Finally, there are some utilities that can produce a hybrid booting external USB drives, ie it can boot in both BIOS and UEFI systems. In this case, the bootable USB drive can be used in both older and newer hardware systems. The caveat is that this setup is not reliable and may require some changes to your bios booting options.
5. UEFI Boot Reference Table:
In order to simplify the booting process, we have created a UEFI/MBR boot table as shown below. The area in green shows the conditions for a successful booting process, whereas the area shown in red displays a failed booting process. The column (Legacy\Uefi) is better known as CSM boot mode. If you can match the settings of your hardware (motherboard), bootable USB/CD drive and internal hard drive, only then your system will boot correctly.

The table above assumes the following possible combinations:
- 2 hard drive formats (MBR, GPT).
- 3 motherboard BIOS settings (legacy bios, legacy uefi, uefi).
- 4 external USB drive settings (iso-uefi-fat32, iso-uefi-ntfs, iso-mbr-fat32, iso-mbr-ntfs).
So in theory there are a possible combinations of events totalling (2 x 3 x 4 = 24). These combinations are not set in stone and it is possible to expand it to include further variations such as; secure boot, NTFS, FAT32, etc. However, it is more practical to reduce the size of the compatibility reference boot table in order to make it more usable and decrease complexity.
The UEFI/MBR reference boot table includes some assumptions that have been made and referenced in the legends under the table. For example, the secure boot option setting may impact the success of the booting process. It is therefore recommended to disable this option during the installation process, and re-enable it after the completion of Windows installation.
If you are using a bootable CD/DVD drive instead of a USB drive then the proposed Reference Boot Table below will still apply. However, you may encounter improved compatibility when booting CD/DVD that contains UEFI files. This means CD/DVD that contains images based on UEFI format may still boot under both legacy or UEFI modes. If the CD only contains the standard MBR files then it will only boot under legacy settings.
6. Summary:
Please observe the following for a successful booting process:
- Use the UEFI/MBR reference boot table to check if your settings are correct.
- MBR scheme should only be used with older systems or 32-bit OS versions.
- New computers should use the UEFI scheme where possible for the advantages mentioned earlier.
- Disable secure boot if you are using modified ISO files or having booting issues. Don’t forget to re-enable this option to secure you system.
- UEFI will only work with 64-bit systems (with minor exceptions).
- UEFI requires GPT based hard drive.
- UEFI stores boot file on a separate FAT32 partition.
- IF your bootable ISO image is UEFI based and contains a file that is larger than 4GB, then you will need two partitions inside your USB drive. First partition must be a FAT32 for storing boot files, and a standard NTFS partition for storing system files. There are utilities available such as Rufus that will automatically partition your USB drive to meet these requirements.
- If you are still using CD/DVD drive the MBR/UEFI reference boot table is still valid. However, depending on your hardware, you may find that it is a little more flexible with UEFI booting. For example, you may be able to boot a UEFI DVD using the legacy mode.
- The proposed boot table is also valid for any bootable software/utility and not just Microsoft Windows software.
Finally, if your system is already formatted and you change the BIOS options, your system may not boot successfully. Once again, use the proposed boot table above to check that all the set parameters are compatible. This procedure, if followed will help you repair any system, not just Windows 10, that is not working or not booting properly.